Home page and GUI layout
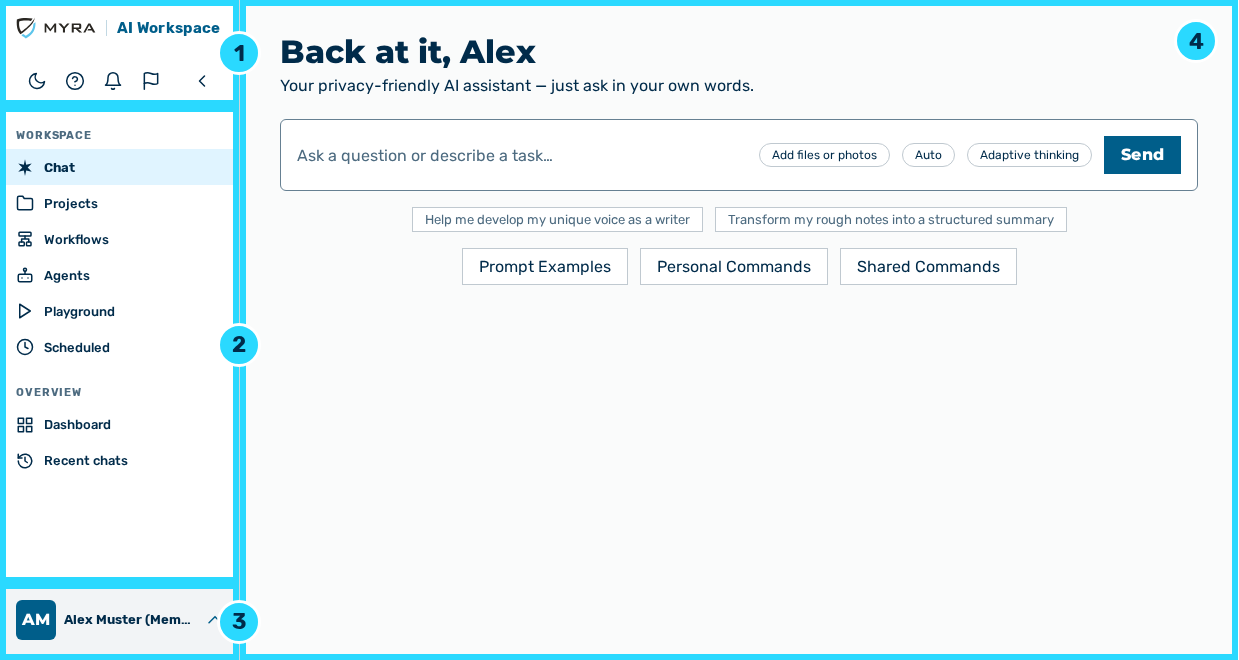
Layout of the interface
The following areas are available:
| No. | Area | Description |
|---|---|---|
| 1 | Header | Shows the logo and holds the Dark mode, Documentation, Notifications, Send feedback, and Collapse buttons. |
| 2 | Navigation area | Lists the entries of the current area, grouped by section. |
| 3 | User block | Shows your name with your role and opens the user menu. |
| 4 | Content area | Shows the selected view. |
The application separates the Workspace area from the areas of the administration. The workspace contains the daily work with the AI. The areas of the administration contain the settings. You move between them through your name at the bottom of the navigation bar. The Back to workspace link at the top of the navigation bar goes from every area of the administration back to the workspace.
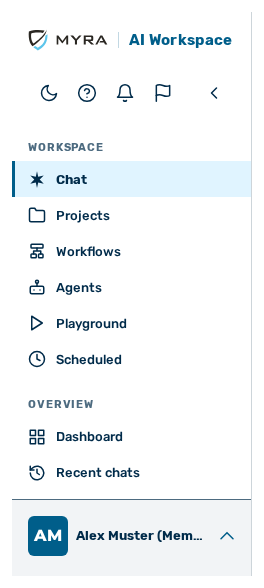
Navigation bar
The following options are available:
| Entry | Description |
|---|---|
| Chat | Opens a conversation with the AI. |
| Projects | Holds related chats, files, and its own instructions together, so that the AI uses the same context for one field of work. |
| Workflows | Creates multi-stage workflows from your agents — with branches, approvals, and delivery. |
| Agents | Lists the agents saved with their instructions, model, tools, schedules, and run history. |
| Playground | Runs a prompt against one or more models and presents the answers side by side. |
| Scheduled | Runs a prompt on a schedule. The results appear in a conversation and, if you want, by email as well. |
| Dashboard | Shows your personal usage. For the roles without an analytics permission, the view carries the My Usage title. |
| Recent chats | Shows all conversations so far, the most recent first. |
Note
The Workflows and Scheduled entries do not appear for the Viewer and Demo User roles. For the Demo User role, only the Chat entry leads to a usable view. Every other entry shows Not available in the demo.
Proceed as follows to open an administration area:
- ► On the start page, click on your name at the bottom of the navigation bar.
- ↳ The user menu opens.
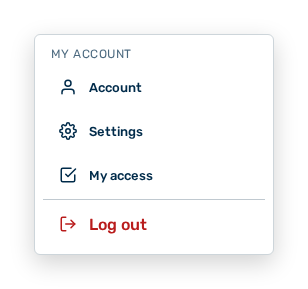
User menu
User menu
The user menu is divided into groups. For your role, it contains the My Account group. The Log out entry is below a separator.
The following options are available:
| Entry | Description |
|---|---|
| Account | Opens the Account area with your profile. |
| Settings | Opens the Settings area. |
| My access | Shows your role, the roles assigned to you, and your project memberships. |
| Log out | Logs you out of Myra AI Workspace. |
- ► Click on the entry of the area you want.
- ➔ The navigation bar shows the selected area.
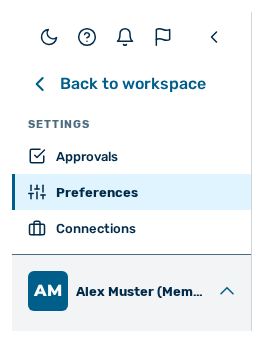
Navigation bar in the Settings area
In the Settings area, the navigation bar shows entries. An entry opens either a view or a view with tabs.
The following options are available:
| Entry | Description |
|---|---|
| Approvals | Shows the workflow runs that wait for your decision. |
| Preferences | Sets the language, the currency, the chat behaviour, the personal commands, and the masking of personal data. |
| Connections | Manages your personal MCP connectors. |
Note
The user menu of the Demo User role contains the Log out entry only. The My Account group with the Account, Settings, and My access entries does not appear for it.
The Account area shows one entry in the navigation bar. The view is divided into tabs.
The following options are available:
| Tab | Description |
|---|---|
| Profile | Shows your profile, your tokens, and the data export. |
Note
For the Viewer role, the Profile tab shows your profile and the data export. This role creates no tokens.