Managing user accounts
A user account gives a person access to Myra AI Workspace and carries their role.
Creating a user account
The following requirements are met:
- ☑ Your user account has the Manage tenant users permission.
- ☑ The email address of the person is available.
Proceed as follows to create a user account:
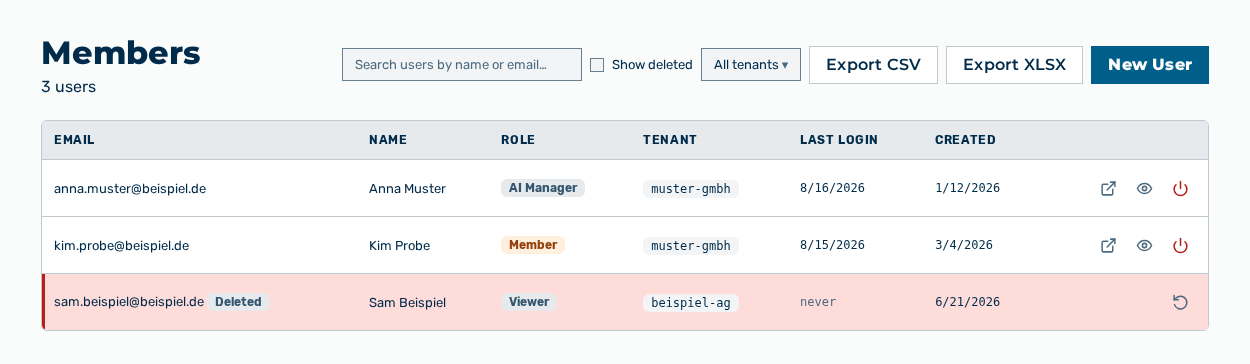
Members view
-
► In the User Management area, open the Members tab.
- ▷ On the start page, click on your name at the bottom of the navigation bar.
- ↳ The user menu opens.
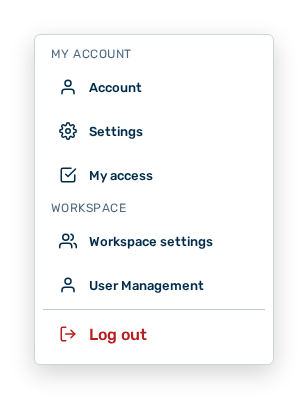
User menu
- ▷ In the Workspace group, click on the User Management entry.
- ↳ The navigation bar shows the User Management area. The Members tab is open.
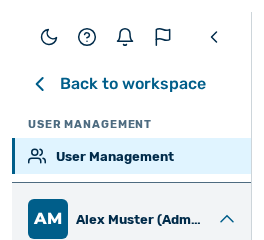
Navigation bar in the User Management area
-
► Click on the New User button.
- ↳ The New User dialog opens.
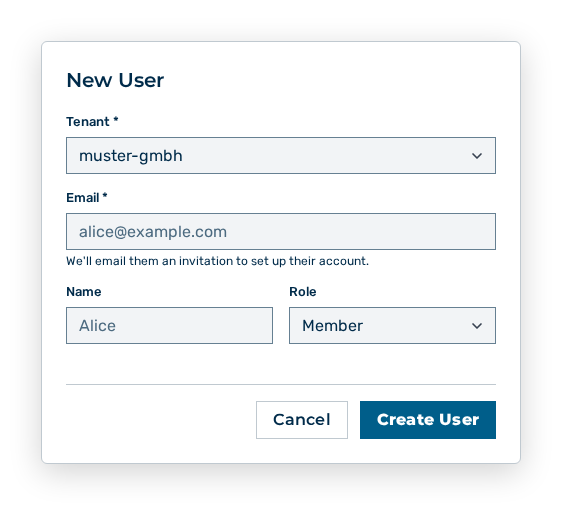
New User dialog
- ► Select the tenant.
- ► Enter the email address.
- ► Select the role.
- ► Click on the Create User button.
- ➔ Myra AI Workspace creates the user account. The person signs in with a one-time code.
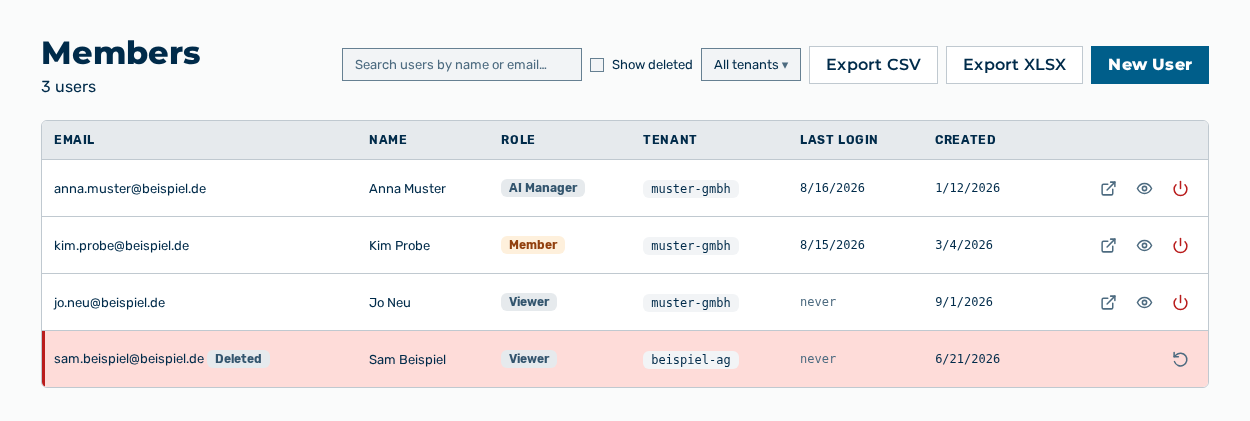
Members view with the new user account
Data in the New User dialog
New User dialog
You set the following data at creation:
| Item | Description |
|---|---|
| Tenant * | Tenant that the user account belongs to. The list holds the tenants of the work area. The item is mandatory. |
| Email * | Email address of the user account, for example alice@example.com. Myra AI Workspace sends an invitation to this address to set up the account. The item is mandatory. |
| Name | Name of the user. The item is optional. |
| Role | Role of the user account: Administrator, Tenant Administrator, AI Manager, Finance, Member, Viewer, or Demo User. The role sets which views and functions the account uses. |
The following options are available in the dialog:
| Option | Description |
|---|---|
| Create User button | Creates the user account and sends the invitation. During the creation, the button shows Creating…. |
| Cancel button | Closes the dialog without creating the user account. |
Note
If the email address is already part of a workspace, the dialog shows That email address is already part of a workspace. If the plan holds no further seats, the dialog shows You've reached your plan's seat limit. Remove a member, or change your plan to add more seats.
Editing a user account
Proceed as follows to edit a user account:
Members view
-
► In the User Management area, open the Members tab.
- ▷ On the start page, click on your name at the bottom of the navigation bar.
- ↳ The user menu opens.
User menu
- ▷ In the Workspace group, click on the User Management entry.
- ↳ The navigation bar shows the User Management area. The Members tab is open.
Navigation bar in the User Management area
-
► Open the user account.
- ↳ The
detail panel opens.
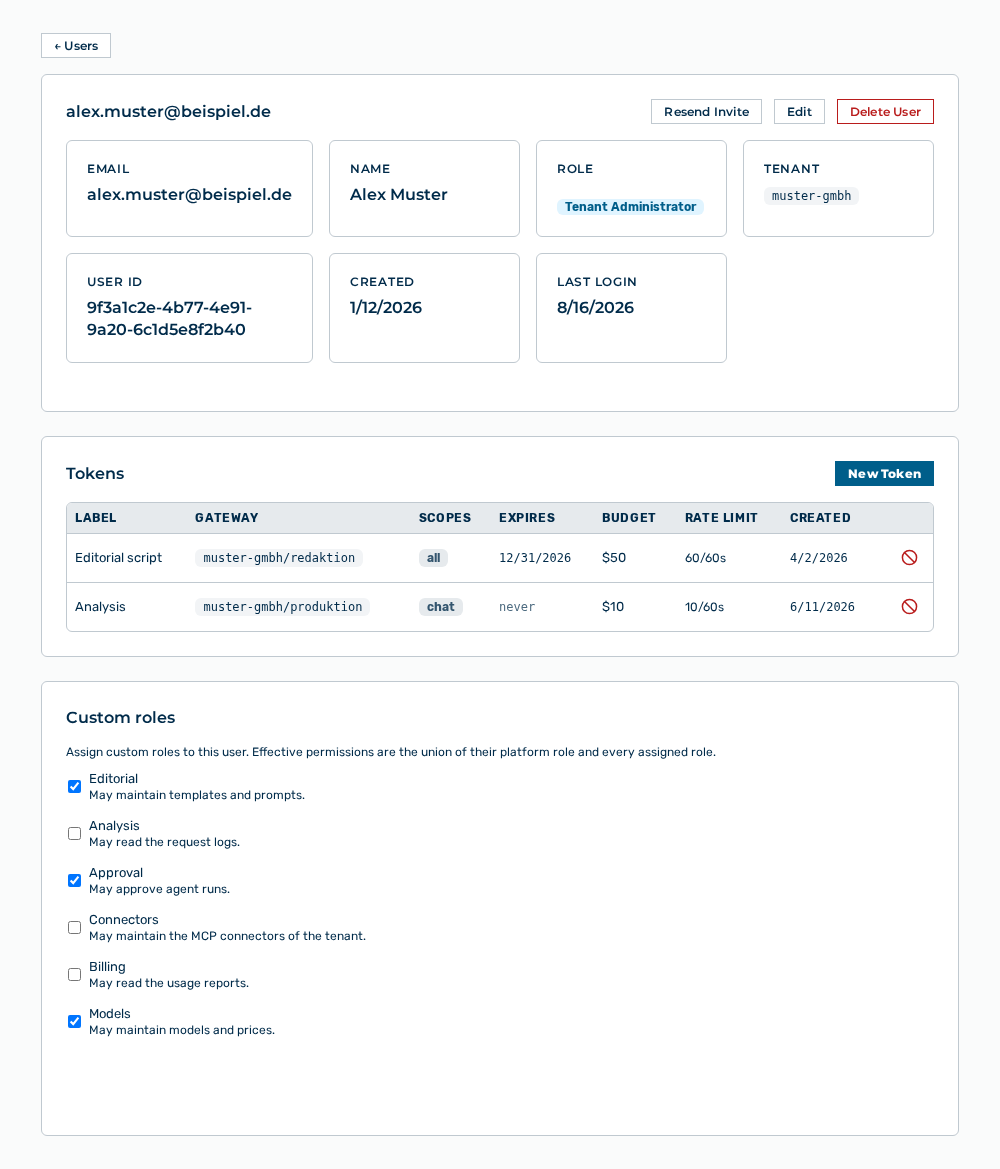
Detail panel of a user account
- ► Click on the Edit button.
- ↳ The Edit:
dialog opens.
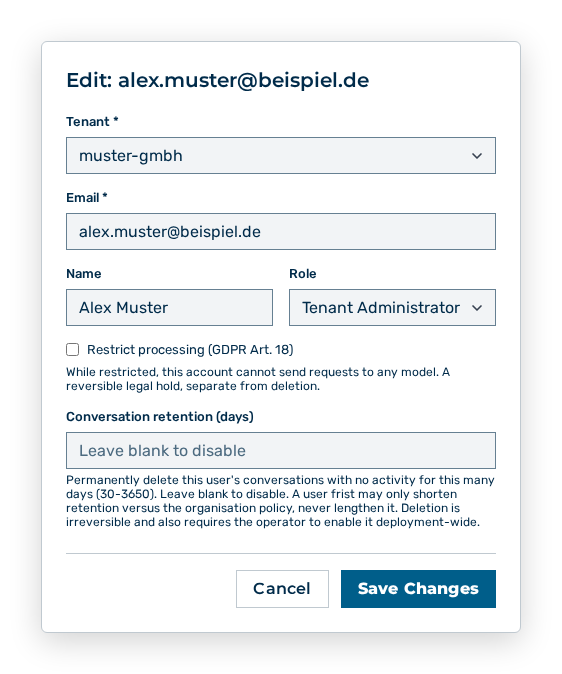
Edit dialog
- ► Change the tenant, the name, the role, the processing restriction, or the conversation retention.
- ► Click on the Save Changes button.
- ➔ Myra AI Workspace applies the change at the next request of the user account.
Detail panel of a user account
Data in the Edit dialog
Edit dialog
You change the following data in the dialog:
| Item | Effect of the change |
|---|---|
| Tenant * | Assigns the user account to another tenant. |
| Email * | Changes the address that the person logs in with. |
| Name | Changes the name in the list of the user accounts and in the detail view. |
| Role | Changes the role of the user account: Administrator, Tenant Administrator, AI Manager, Finance, Member, Viewer, or Demo User. Myra AI Workspace applies the new role with the next request of the user account. |
| Restrict processing (GDPR Art. 18) | While restricted, this account cannot send requests to any model. A reversible legal hold, separate from deletion. |
| Conversation retention (days) | Permanently deletes this user's conversations with no activity for this many days (30–3650). To disable the deletion, leave the field empty. A user period may only shorten retention versus the organization policy, never lengthen it. |
The following options are available in the dialog:
| Option | Description |
|---|---|
| Save Changes button | Applies the changes. During the saving, the button shows Saving…. |
| Cancel button | Closes the dialog without applying the changes. |
Note
The deletion by the retention period is irreversible and also requires the operator to enable it deployment-wide.
Deleting a user account
Proceed as follows to delete a user account:
Members view
-
► In the User Management area, open the Members tab.
- ▷ On the start page, click on your name at the bottom of the navigation bar.
- ↳ The user menu opens.
User menu
- ▷ In the Workspace group, click on the User Management entry.
- ↳ The navigation bar shows the User Management area. The Members tab is open.
Navigation bar in the User Management area
-
► Open the user account.
- ↳ The
detail panel opens.
Detail panel of a user account
- ► Click on the Delete User button.
- ↳ The Delete user "
"? Their tokens will also be revoked. query opens.
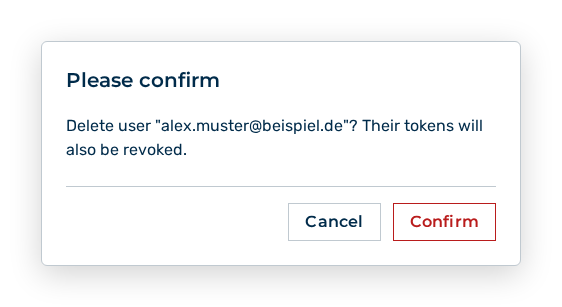
Delete user query
- ► Confirm the query.
- ➔ Myra AI Workspace deletes the user account and revokes its tokens. The Show deleted check box shows it again with the Deleted mark.
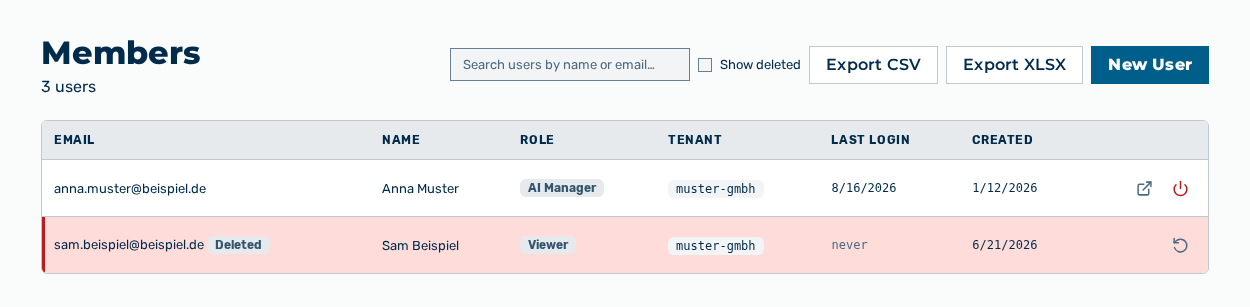
Members view without the user account
Effects of the deletion
The deletion has the following effects:
| Object | Effect |
|---|---|
| User account | Myra AI Workspace marks the account as Deleted. The person no longer logs in. |
| Tokens | Myra AI Workspace revokes all tokens of the user account. Requests with these tokens then fail. |
| List | The Show deleted check box shows the account again. The Restore row action restores it. |
Note
If the deletion fails, the view shows Couldn't remove that user. Please try again.