Step 6: Examine the roles
A role groups the permissions that a user account gets. Myra AI Workspace supplies prepared roles. Create your own role only if none of them agrees with your structure.
The following requirements are met:
- ☑ Step 5 is complete, see Set up the guardrails.
Proceed as follows to examine the roles:
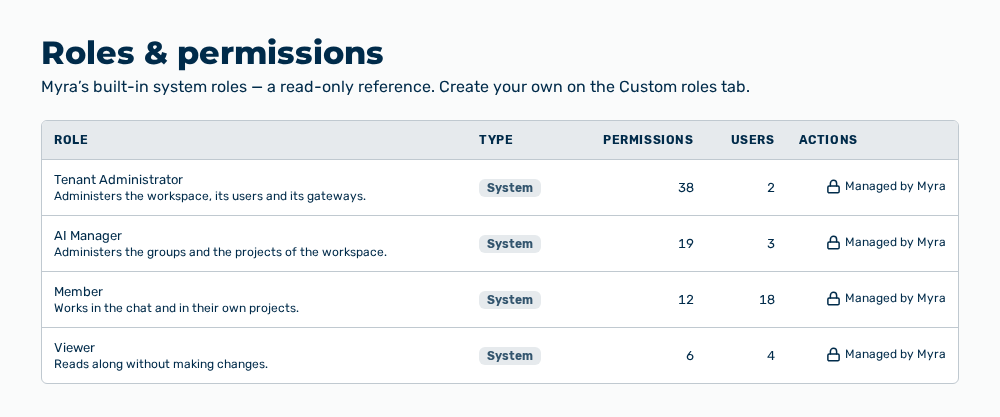
Roles & permissions view
-
► In the User Management area, open the Roles & permissions tab.
- ▷ On the start page, click on your name at the bottom of the navigation bar.
- ↳ The user menu opens.
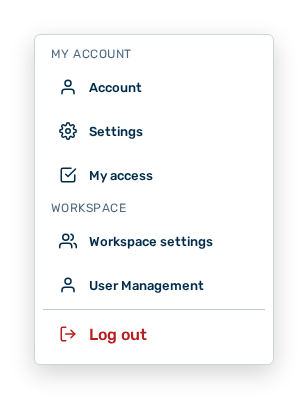
User menu
- ▷ In the Workspace group, click on the User Management entry.
- ↳ The navigation bar shows the User Management area. The Members tab is open.
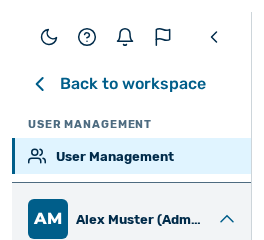
Navigation bar in the User Management area
- ▷ Open the Roles & permissions tab.
- ► Examine which permissions the available roles carry.
- ► If you need your own role, open the Custom roles tab.
- ► Click on the New role button.
- ➔ The role is available for selection when you create a user account.
Roles & permissions view
The Creating a role section describes which permissions are available.