Managing agents
An agent holds instructions, a model, tools, schedules, and the run history together.
Creating an agent
The following requirements are met:
- ☑ Your user account has the Create and manage own agents permission.
- ☑ At least one model is enabled on the gateway.
Proceed as follows to create an agent:
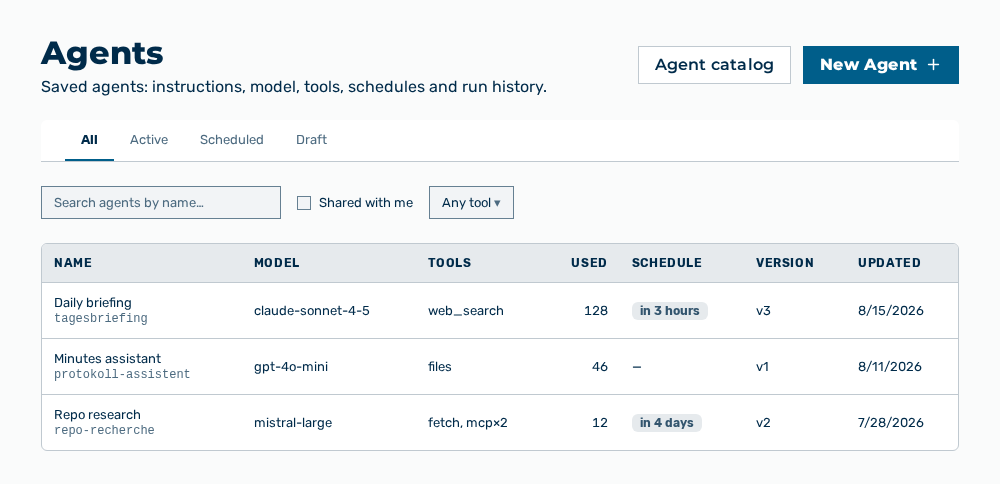
Agents view
- ► On the start page, open the Agents view in the Workspace work area.
- ► Click on the New Agent button.
- ↳ The New Agent dialog opens.
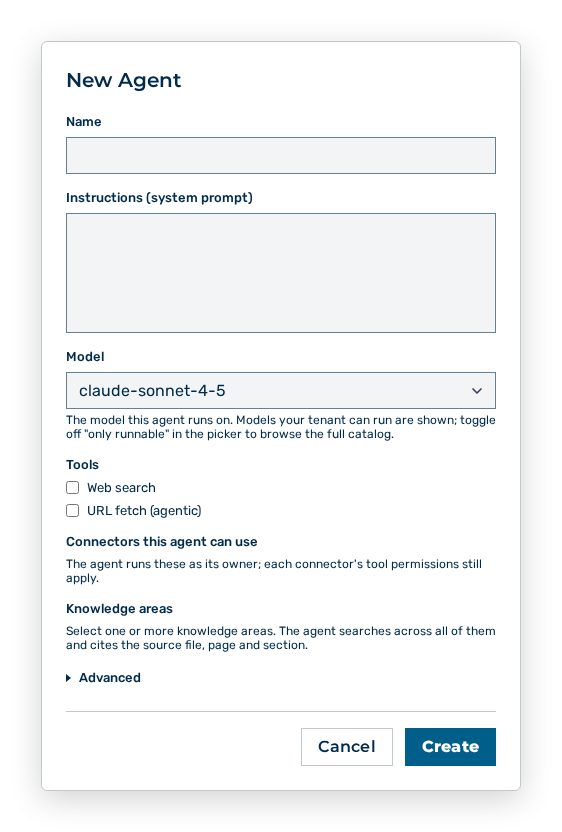
New Agent dialog
- ► Enter the name and the slug.
- ► Select the model.
- ► Set the instructions and the maximum number of the tokens.
- ► Click on the Create button.
- ➔ Myra AI Workspace creates the agent and opens its detail view.
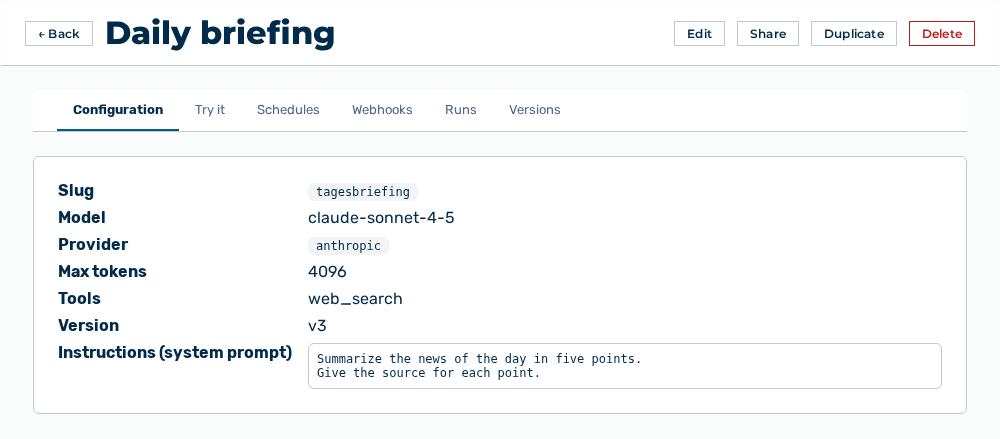
Detail view of an agent
Entries in the New Agent dialog
New Agent dialog
You set the following entries when you create the agent:
| Entry | Description |
|---|---|
| Name * | Name of the agent in the list of agents and in the detail view. The entry is mandatory. |
| Instructions (system prompt) | System prompt that controls each run of the agent. The text sets the task, the tone and the limits of the agent. |
| Model * | Model the agent runs on. The drop-down list shows the models your tenant can run. If you switch off the only runnable setting in the picker, you browse the full model catalog. The entry is mandatory. |
| Tools: Web search | The agent searches the web to support its answer. |
| Tools: URL fetch (agentic) | The agent fetches the content of the addresses it selects itself. |
| Tools: Include sources list in the answer | The agent appends the sources it used to its answer. |
| Connectors this agent can use | MCP connectors the agent calls. The agent runs these as its owner. The tool permissions of each connector still apply. If no connector exists yet, the dialog shows No connectors yet. and points to the MCP Connectors page. |
| Knowledge areas | Knowledge areas the agent searches. The agent searches across all selected areas and cites the source file, the page and the section. If no knowledge area exists yet, the dialog shows No knowledge areas yet. and points to the Projects page. |
| Advanced: Slug * | Stable handle in the invoke URL of the agent. The entry is mandatory. |
| Advanced: Max tokens | Upper limit of the tokens per answer of the agent. The value is a positive integer. |
The following options are available in the dialog:
| Option | Description |
|---|---|
| Advanced group | Expands and collapses the Slug and Max tokens entries. |
| Test run (preview) area | Runs the draft against a sample prompt before you save it. Model, instructions, web search, agentic fetch, connectors and knowledge areas take effect and run under your user account. The Run preview button starts the test run. |
| Create button | Creates the agent. While the agent is created, the button shows the label Saving…. |
| Cancel button | Closes the dialog without creating the agent. |
Note
The dialog requires the name, the slug and the model. If an entry is missing, it shows Name is required, Slug is required or Model is required. If the Max tokens entry is not a positive integer, it shows Max tokens must be a positive integer.
Note
If the selected model does not support tools, the dialog shows The selected model does not support tools. Pick a tool-capable model to enable web search, URL fetch, connectors and knowledge areas. If the Playground is switched off for the tenant, the Test run (preview) area shows the message The preview requires the Playground, which is disabled for this tenant.
Editing an agent
Proceed as follows to edit an agent:
Agents view
- ► On the start page, open the Agents view in the Workspace work area.
- ► Open the agent.
- ↳ The detail view of the agent opens.
Detail view of an agent
- ► Click on the Edit Agent button.
- ► Change the instructions, the model, the tools, the schedules, or the webhook triggers.
- ► Click on the Save button.
- ➔ Myra AI Workspace creates a new version of the agent.
Detail view of an agent
Entries in the Edit Agent dialog
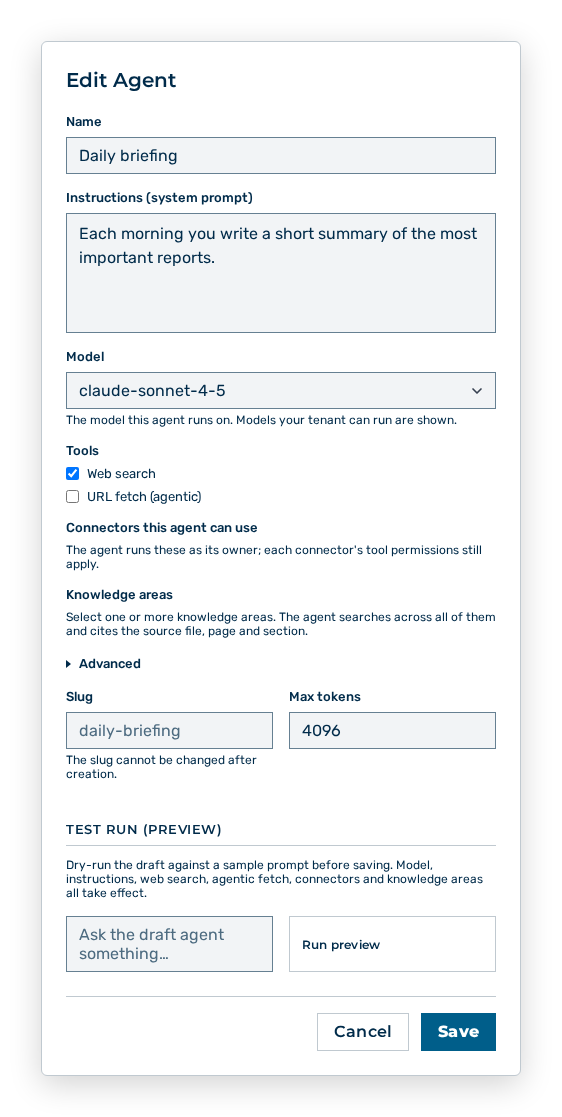
Edit Agent dialog
You change the following entries in the dialog:
| Entry | Effect of the change |
|---|---|
| Name | Changes the name in the list of agents and in the detail view. |
| Instructions (system prompt) | Changes the behaviour of the agent from the next run on. Completed runs stay unchanged. |
| Model | Changes the model the agent runs on. If the new model does not support tools, web search, URL fetch, connectors and knowledge areas are no longer available. |
| Tools | Extends or limits the tools of the agent from the next run on. |
| Connectors this agent can use | Changes the MCP connectors of the agent. Connectors you do not manage are kept when you save. The dialog shows a note about them. |
| Knowledge areas | Changes the knowledge areas the agent searches. Bindings you do not manage are kept when you save. The dialog shows a note about them. |
| Advanced: Slug | The entry is locked. The slug cannot be changed after creation, so that the invoke URL of the agent stays valid. |
| Advanced: Max tokens | Changes the upper limit of the tokens per answer of the agent. |
The following options are available in the dialog:
| Option | Description |
|---|---|
| Test run (preview) area | Runs the changed draft against a sample prompt before you save it. |
| Save button | Applies the changes and creates a new version of the agent. While the agent is saved, the button shows the label Saving…. |
| Cancel button | Closes the dialog without applying the changes. |
Note
Each save creates a new version. The Versions tab of the detail view lists the versions. The Restore this version row action creates a new version with the selected configuration and overwrites nothing.
Deleting an agent
Proceed as follows to delete an agent:
Agents view
- ► On the start page, open the Agents view in the Workspace work area.
- ► Open the agent.
- ↳ The detail view of the agent opens.
Detail view of an agent
- ► Click on the Delete button.
- ↳ The Delete agent "
"? query opens.
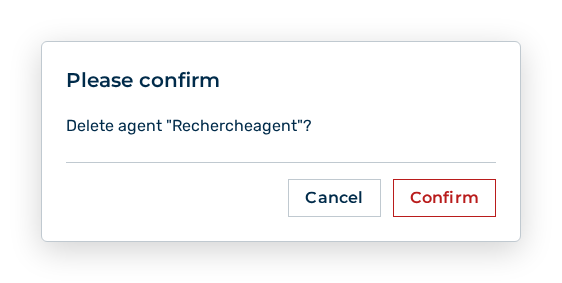
Delete agent query
- ► Confirm the query.
- ➔ Myra AI Workspace deletes the agent with its schedules and webhook triggers.
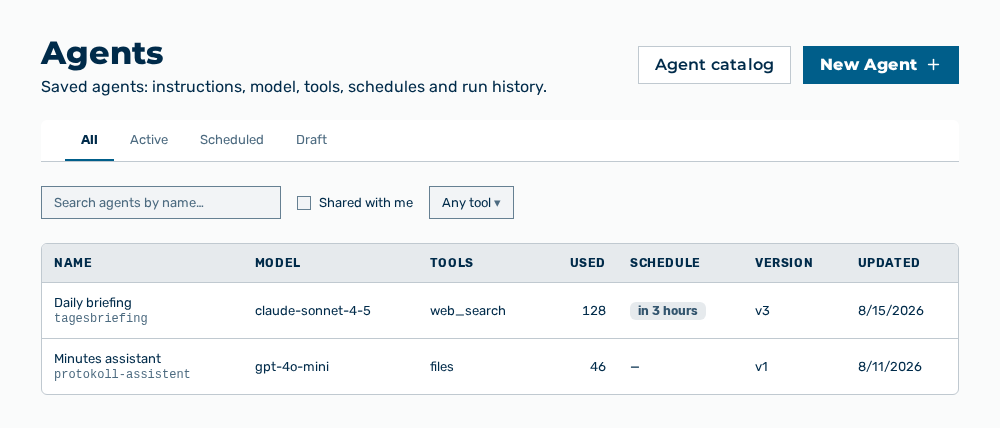
Agents view without the agent
Effects of the deletion
The deletion has the following effects:
| Object | Effect |
|---|---|
| Agent | Myra AI Workspace removes the agent from the list of agents. The invoke URL of the slug no longer responds. |
| Schedules | Myra AI Workspace removes the schedules of the agent. Scheduled runs no longer take place. |
| Webhook triggers | Myra AI Workspace removes the webhook triggers of the agent. Calls to the trigger addresses fail from then on. |
| Runs | The Runs tab with the run history of the agent is no longer available. |
| Shares | The shares to people, groups or the organization end. The agent no longer appears in their list of agents. |
Note
If the deletion fails, the detail view shows The agent could not be deleted.