Managing roles
Your own role puts a set of permissions together for the tenant.
Creating a role
The following requirements are met:
- ☑ Your user account has the Manage roles within the tenant permission.
- ☑ Your user account has every permission that the new role is to get.
Proceed as follows to create a role:
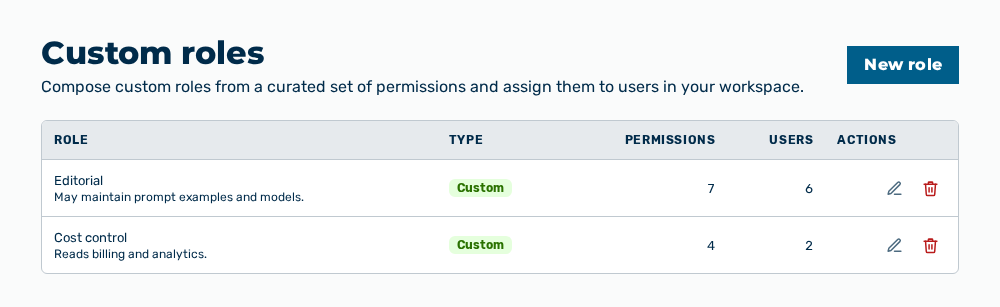
Custom roles view
-
► In the User Management area, open the Custom roles tab.
- ▷ On the start page, click on your name at the bottom of the navigation bar.
- ↳ The user menu opens.
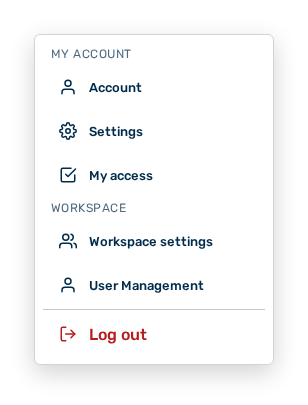
User menu
- ▷ In the Workspace group, click on the User Management entry.
- ↳ The navigation bar shows the User Management area. The Members tab is open.
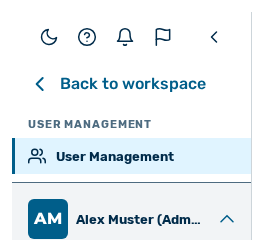
Navigation bar in the User Management area
- ▷ Open the Custom roles tab.
- ► Click on the New role button.
- ↳ The New role dialog opens.
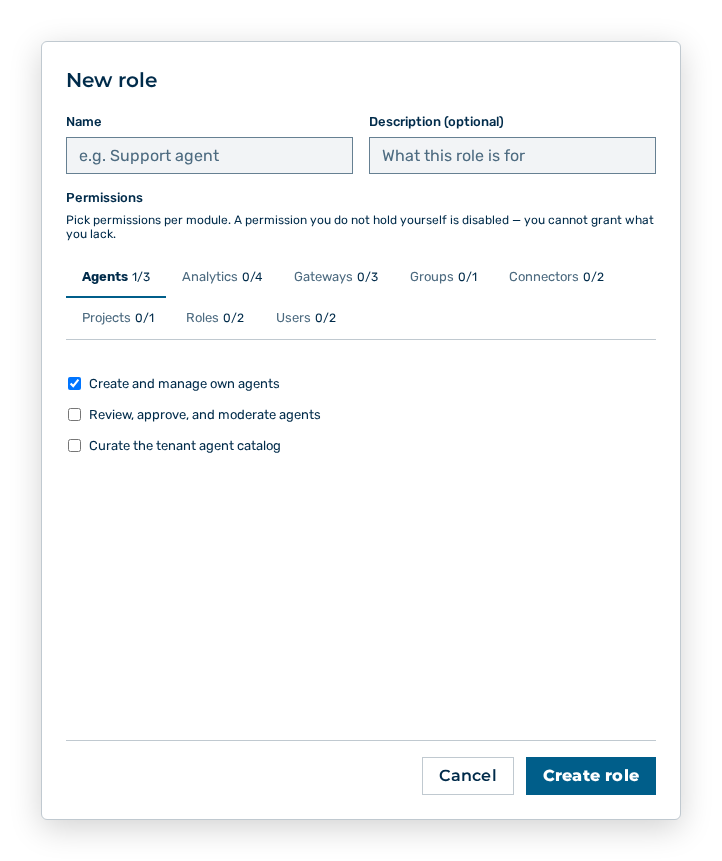
New role dialog
- ► Enter the name of the role.
- ► Select the permissions in the modules.
- ► Click on the Create role button.
- ➔ Myra AI Workspace creates the role. The role is available for selection in the Members view.
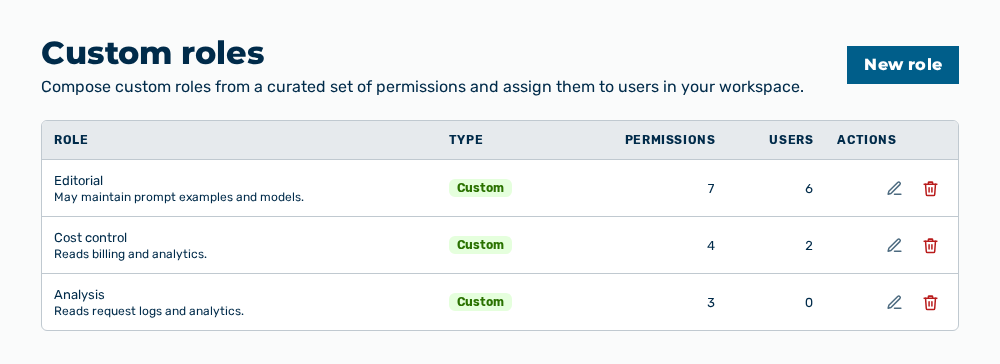
Custom roles view with the new role
Note
You do not give a permission that your own user account does not have. The editor shows it as not assignable.
Data in the New role dialog
New role dialog
You set the following data at creation:
| Item | Description |
|---|---|
| Name | Name of the role, for example Support agent. The name appears in the Role column of the list. The item is mandatory. |
| Description (optional) | Describes what the role is for. The description appears below the name in the list. |
| Permissions | Permissions of the role. The editor lists them per module. One tab per module opens its permissions. |
The following options are available in the dialog:
| Option | Description |
|---|---|
| Create role button | Creates the role. During the creation, the button shows Saving.... |
| Cancel button | Closes the dialog without creating the role. |
Note
If the name field stays empty, the dialog shows A role name is required. If the name is already taken, the dialog shows A role with that name already exists. If you grant a permission that you do not hold yourself, the dialog shows You cannot grant a permission you do not hold yourself.
Editing a role
Proceed as follows to edit a role:
Custom roles view
-
► In the User Management area, open the Custom roles tab.
- ▷ On the start page, click on your name at the bottom of the navigation bar.
- ↳ The user menu opens.
User menu
- ▷ In the Workspace group, click on the User Management entry.
- ↳ The navigation bar shows the User Management area. The Members tab is open.
Navigation bar in the User Management area
- ▷ Open the Custom roles tab.
- ► Open the role.
- ↳ The Edit
dialog opens.
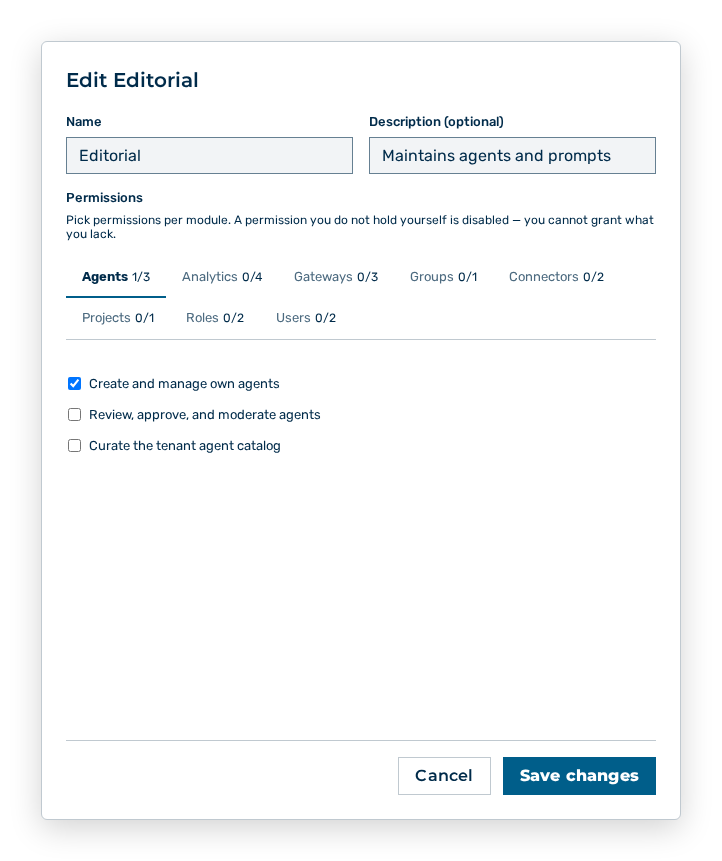
Edit role dialog
- ► Change the selection of the permissions.
- ► Click on the Save changes button.
- ➔ Myra AI Workspace applies the change for every user account with this role.
Custom roles view
Data in the Edit NAME dialog
Edit role dialog
You change the following data in the dialog:
| Item | Effect of the change |
|---|---|
| Name | Changes the name of the role in the list and in the assignment on the user account. |
| Description (optional) | Changes the description below the name. |
| Permissions | Changes the permissions of the role. The change applies to every user account that the role is assigned to. Effective permissions are the union of the platform role of the account and every assigned role. |
The following options are available in the dialog:
| Option | Description |
|---|---|
| Save changes button | Applies the changes. During the saving, the button shows Saving.... |
| Cancel button | Closes the dialog without applying the changes. |
Note
If the role includes permissions that you do not hold yourself, the dialog shows This role includes COUNT permission(s) you do not hold yourself. You can rename it, but changing its permissions requires an admin who holds them.
Deleting a role
Proceed as follows to delete a role:
Custom roles view
-
► In the User Management area, open the Custom roles tab.
- ▷ On the start page, click on your name at the bottom of the navigation bar.
- ↳ The user menu opens.
User menu
- ▷ In the Workspace group, click on the User Management entry.
- ↳ The navigation bar shows the User Management area. The Members tab is open.
Navigation bar in the User Management area
- ▷ Open the Custom roles tab.
- ► Delete the role.
- ↳ The Delete the role
? Its permissions and every user assignment are removed with it. query opens.
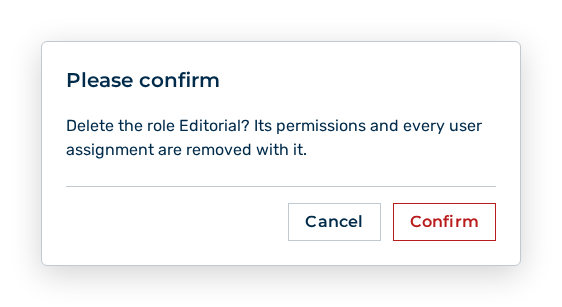
Delete role query
- ► Confirm the query.
- ➔ Myra AI Workspace deletes the role. If the step fails, the view shows Could not delete the role.
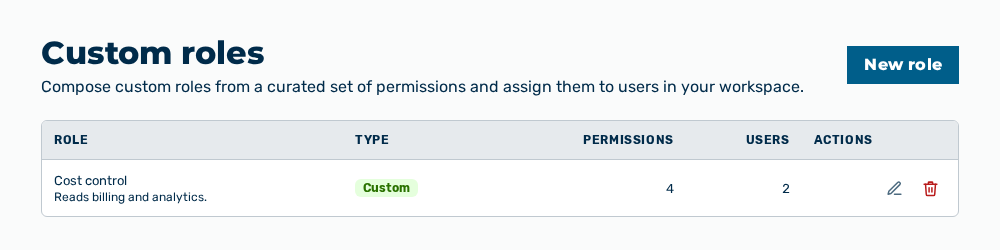
Custom roles view without the role
Effects of the deletion
The deletion has the following effects:
| Object | Effect |
|---|---|
| Role | Myra AI Workspace removes the role from the list. |
| Permissions | Myra AI Workspace removes the permissions of the role. |
| User assignments | Myra AI Workspace removes every assignment of the role. The user accounts concerned keep only the permissions of their platform role and of their remaining roles. |
Note
If the role cannot be deleted, the view shows Could not delete the role.
Note
The Custom roles tab does not appear for the AI Manager and Finance roles. Neither role assigns roles. The Roles & permissions tab shows the system roles of Myra only. You do not create a role there.