Managing projects
A project holds related chats, files, and its own instructions together.
Creating a project
The following requirements are met:
- ☑ Your user account has the Create projects permission.
Proceed as follows to create a project:
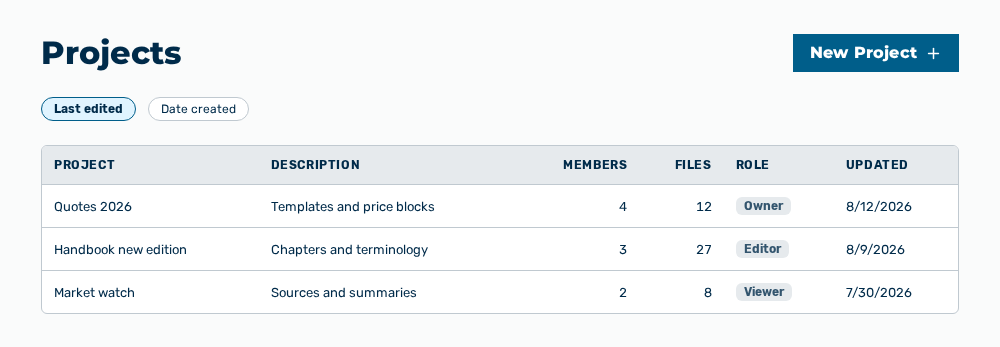
Projects view
- ► On the start page, open the Projects view in the Workspace work area.
- ► Click on the New Project button.
- ↳ The New Project dialog opens.
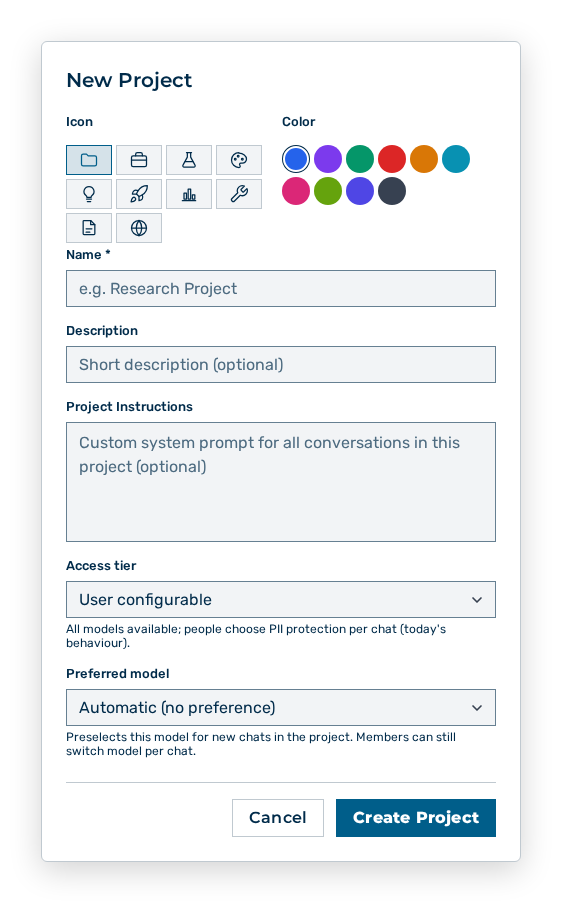
New Project dialog
- ► Enter the name of the project.
- ► If necessary, set the icon, the color, the description, the project instructions, and the access tier.
- ► Click on the Create Project button.
- ➔ Myra AI Workspace creates the project and opens it.
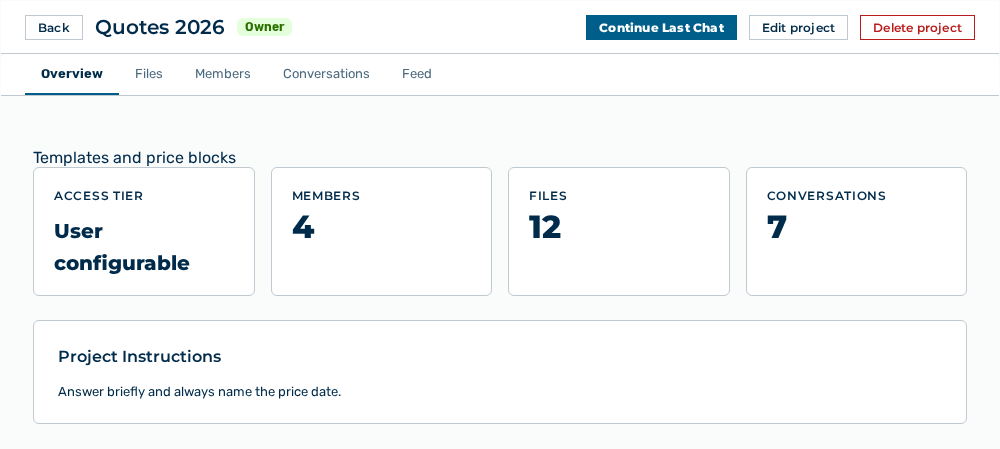
View of a project
Data in the New Project dialog
New Project dialog
You set the following data at creation:
| Item | Description |
|---|---|
| Icon | Icon of the project. The icon marks the project in the list and in the detail view. |
| Color | Color of the icon. The color applies to the display only. |
| Name * | Name of the project, for example Research Project. The item is mandatory. |
| Description | Short description of the project. The description appears in the Description column of the Projects view and in the Overview tab. The item is optional. |
| Project Instructions | Custom system prompt for all conversations in this project. The AI applies the prompt in every conversation of the project. The item is optional. |
| Access tier | Sets which models the project uses and whether PII protection can be turned off. The default is User configurable. |
The following options are available in the dialog:
| Option | Description |
|---|---|
| Create Project button | Creates the project and opens it. During the creation, the button shows Creating…. |
| Cancel button | Closes the dialog without creating the project. |
Note
If the name field stays empty, the dialog shows Name is required.
Access tiers
The access tier applies to every conversation of the project.
| Access tier | Effect |
|---|---|
| User configurable | All models available. People choose PII protection per chat. |
| PII protection required | All models available, but PII protection is always on and cannot be turned off in this project. |
| Local only | Only local Myra models. Data never leaves Myra infrastructure. Cloud models, web search, and external tools are disabled. |
Editing a project
Proceed as follows to edit a project:
Projects view
- ► On the start page, open the Projects view in the Workspace work area.
- ► Open the project.
- ↳ The view of the project opens.
View of a project
- ► Click on the Edit project button.
- ↳ The Overview tab shows the data of the project as a form.
- ► Change the data.
- ► Click on the Save changes button.
- ➔ Myra AI Workspace applies the changes for every conversation of the project.
View of a project
Data in the Edit project form
You change the following data in the form:
| Item | Effect of the change |
|---|---|
| Name | Changes the name in the list of the projects, in the detail view, and in the selection of the project in the chat. |
| Icon | Changes the icon of the project in the list and in the detail view. |
| Color | Changes the color of the icon. |
| Description | Changes the short description in the Description column and in the Overview tab. |
| Project Instructions | Changes the system prompt for all conversations of the project. The change applies from the next message, in existing conversations as well. |
| Access tier | Changes the models available and the PII protection of the project. If you select the Local only access tier, only local Myra models are available for selection. |
| Conversation retention (days) | Permanently deletes this workspace's conversations with no activity for this many days (30–3650). To disable the deletion, leave the field empty. A workspace period may only shorten retention versus the organization policy. |
| Preferred model | Preselects this model for new chats in the project. Members can still switch model per chat. With the Automatic (no preference) selection, the project sets no model. |
The following options are available in the form:
| Option | Description |
|---|---|
| Save changes button | Applies the changes. During the saving, the button shows Saving…. |
| Cancel button | Closes the form without applying the changes. |
Note
The Owner and Editor project roles and the Administrator role open the form. The Conversation retention (days) field appears only for the Owner project role and for the Administrator role. The deletion is irreversible.
Deleting a project
Proceed as follows to delete a project:
Projects view
- ► On the start page, open the Projects view in the Workspace work area.
- ► Open the project.
- ↳ The view of the project opens.
View of a project
- ► Click on the Delete project button.
- ↳ The Delete Project? dialog opens with the This cannot be undone. hint.
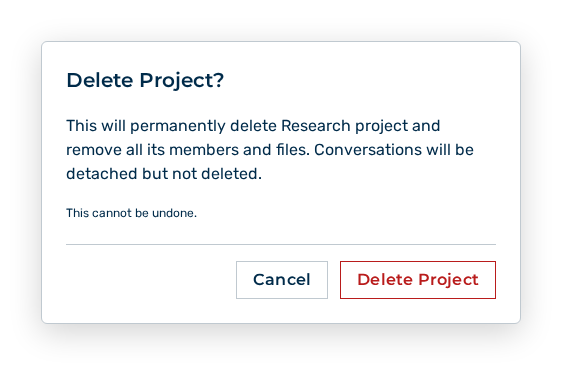
Delete Project dialog
- ► Click on the Delete project button.
- ➔ Myra AI Workspace deletes the project.
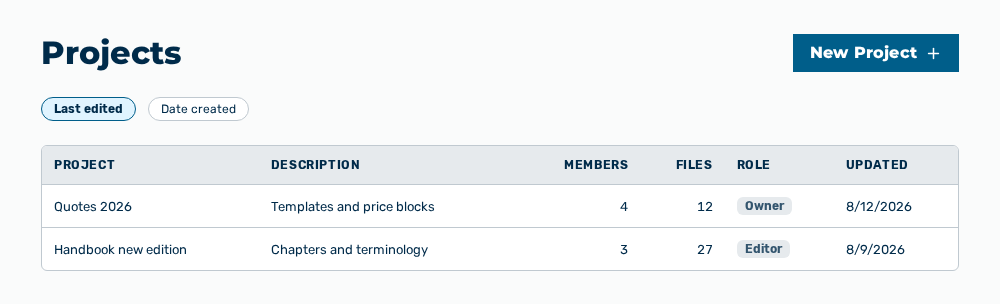
Projects view without the project
Effects of the deletion
The deletion has the following effects:
| Object | Effect |
|---|---|
| Project | Myra AI Workspace deletes the project permanently. |
| Members | Myra AI Workspace removes all members of the project. |
| Knowledge files | Myra AI Workspace removes all files of the project. |
| Conversations | Myra AI Workspace detaches the conversations from the project, but does not delete them. |
The following options are available in the dialog:
| Option | Description |
|---|---|
| Delete Project button | Deletes the project. During the deletion, the button shows Deleting…. |
| Cancel button | Closes the dialog without deleting the project. |
Note
The Owner project role and the Administrator role delete the project. If the deletion fails, the dialog shows Delete failed with the cause.